Since I no longer live
five minutes away from my place of work, I now need a lunch box to transport
nourishment for the various snacks and lunch I consume throughout the day. I have this “problem” now when I walk
throughout a store looking for something I need or want. I no longer just grab the item and buy it, I
have this though that runs through my head “I can make that!” Obviously, I don’t think this thought is a
bad thing, it just helps to boost my creativity and skill. Not to mention, I did just buy an entire yard
of iron-on vinyl and need a way to use it.
I pinned what I thought
would be an awesome tutorial, but ended up slightly confused being as it is in
a language I cannot read and Google did not translate. After an hour or so of staring at this thing
from top to bottom, I finally figured it out!
I’ll go ahead and describe what exactly I did with the picture tutorial
I used.
Step 1: Gather
supplies.
1.
You
will need a 16x16 piece of iron-on vinyl and 2 8x16 pieces of vinyl
2.
A 16x16 piece of fabric and 2 8x16 pieces
of the same fabric (this will be used for the inside),
3.
2 8x16 pieces of a coordinating fabric
(for the top of the outside)
4.
Another piece of coordinating fabric cut
to about 16x16” (for the bottom of the outside)
5.
A
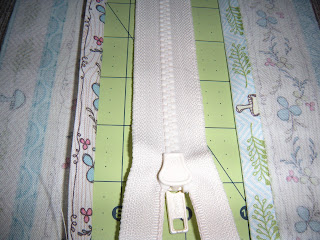
16” sports zipper
6.
Coordinating thread
7.
2 7.5x16” pieces of medium-weight
interfacing, and a 16x16” piece of medium-weight interfacing
8.
2 7.5x16” pieces of insulated batting, a
16x16” piece of insulated batting
9.
2 21” lengths of material for a handle
Step 2: Sew on
the zipper. Using both pieces of the
8x16 outside top fabric, iron down top edge ½ inch. Insert interfacing under the fold in fabric. Pin zipper onto one side and sew on. Pin zipper to other side and sew down.
Step 3: Add
handles. Using the 16x16 piece of fabric
for the outside of the lunch box and the 16x16 piece of interfacing and the
16x16 piece of insulated batting, layer the batting, shiny side out, interfacing
then the fabric, then add the handles, loops facing inward. Sew around entire square of fabric, securing
the handles as you go
Step 4: Add
insulated batting to the top. Add the
batting to the fabric with the shiny side facing you. Stitch down.
I used a pretty stitch at the top edge (near the zipper) just to
showcase the thread I used and the awesome decorative stitches my machine is
capable of stitching.
Step 5: Attach
the top and bottom. Layer the bottom and
top pieces, right sides facing. Stitch around
the entire edge.
Step 6: Create
the outside. Cut 4x4” squares out of all
four edges. Pinch the edges together
with seams touching. Sew all four edges
shut.
Step 7: Iron
on vinyl and create inside. Iron vinyl pieces
to inner lining using instructions on the packaging. Follow the above steps to create the
inside. Flip the inner lining right side
out and add it to the outside by inserting the outside of the bag into the
inside of the bag. Stitch the opening of
the outside to the zipper of the top.
Step 8: Flip
it out. Unzip the zipper and flip the
bag right-side out, pressing out on all edges to create your box.
Enjoy your creation.


No comments:
Post a Comment