I know I have been slacking when it’s come to the
tutorials/projects lately, but I’m about to throw all of what I’ve been doing
lately out there at once. Not to make
excuses… actually, to make an excuse, we’ve been busy moving. I slowed down on the amount of crafts I’ve
been making, but there are quite a few wonderful creations for you to check out
and maybe make for yourself. Just stay
tuned to see the products of my creativity.
My niece just turned 1 year old a couple of weeks
ago. Wanting to give her something
hand-crafted, I set out on a nearly impossible journey. What in the world do
you make a one year old for their birthday?
Matt’s mom gave me the most wonderful book to flip through. There were lots of great appliqué projects. I wanted to try a few just to learn how to do
appliqué. After all, the sewing machine
Matt got me for Christmas has some really awesome stitches, making it great for
appliqué. I decided upon a bib and Matt
chose the lion we placed on it. In a
hurry to complete the project, I failed to get a final- product picture, but I’ll
show you the process anyway.
Step 1: Gather
your gear. You will need a washcloth or
some terry-cloth, small scraps of fabric, tear-away embroidery stabilizer, coordinating
thread, a fabric marker, and Velcro.
Step 2: Choose
your project. I chose the bib project
from Quilts, Bibs, Blankies… Oh My! by Kim Schaefer.
Step 3: Cut
out your fabric. Using the template
provided within the book, cut out the bib shape first. I folded the washcloth in half and taped the
template to the cloth, then cut around it.
Follow this same process with each appliqué piece until all are cut out.
Step 4:
Assemble. Assemble your fabric to
make sure everything is cut out in the proper size.
Step 5: Begin
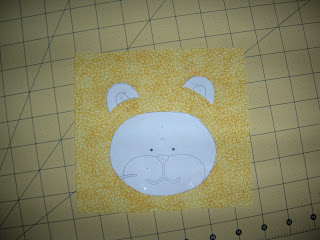
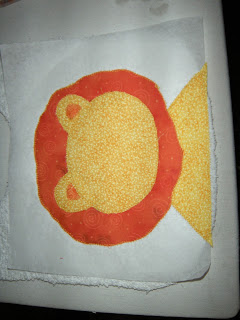
the appliqué process. Layer a square
of embroidery stabilizer under your appliqué pieces. I also did one with a frog on it.
Place the first piece of
the design down and silk-stitch around the edges, being sure to turn the fabric
when necessary.
Step 6:
Applique. Layer each piece until
all pieces are compiled.
Now, tear away the embroidery stabilizer.
Step 7: Use your
fabric marker. Draw on features too
small to appliqué. I had to draw on whiskers, eyes
and eyebrows to my adorable little lion.
Step 8: Attach
a cute backing. I had some left-over
flannel, so I added an extra layer on the back of the bib to be ultra-comfy for
Audri.
Step 9: Bind
it. Sew your binding around the edges to
finish off the bib.
Step 10: Add
the Velcro. I added the Velcro to the
top edge of the bib and the edge of the binding in order to make the bib adjustable.
The finished product was so cute, I just loved
it! I can’t wait to make more projects
from this amazing book.


No comments:
Post a Comment